Complete Guide to Using the Neo-6M GPS Module
What is the Neo-6M GPS Module?
The Neo-6M is a highly versatile and compact GPS module designed to receive signals from multiple satellites in orbit and process them to determine your precise geographic location. This includes critical information such as Longitude and Latitude, which pinpoint your position on the Earth’s surface. In addition to basic location data, the Neo-6M is capable of providing other valuable metrics, including altitude (your height above sea level), speed (useful for tracking movement or navigation), and time-related data synchronized with global standards.
One of the key features of the Neo-6M is its ability to deliver accurate and real-time location data using the NMEA protocol. This makes it a reliable choice for a wide range of applications where precision tracking is essential. Due to its compatibility with Arduino and other microcontroller platforms, this module is extensively utilized in DIY electronics projects, robotics, vehicle tracking systems, and IoT-based solutions.
Its small form factor and low power consumption make it ideal for portable and embedded systems. Whether you’re building a smart navigation system for a vehicle, creating a real-time location tracker for a drone, or experimenting with IoT applications that require geolocation, the Neo-6M GPS module provides a powerful and efficient solution.
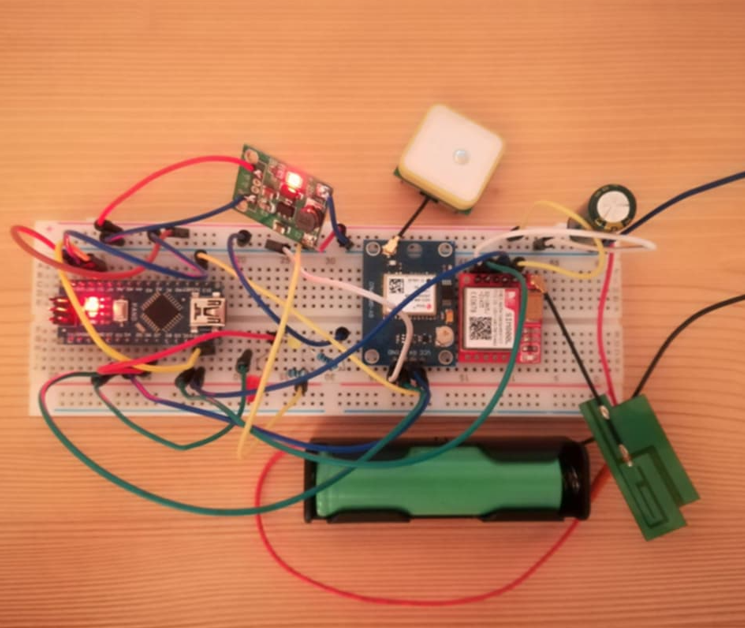
Required Components:
- Neo-6M GPS Module
- Arduino Board (UNO, Mega, or Nano)
- Jumper Wires
- Breadboard (optional)
- Power Supply (5V)
- SIM800L GSM/GPRS Module (for map-based projects)
Connecting the Neo-6M GPS Module:
Neo-6M → Arduino:
- VCC → Arduino 5V
- GND → Arduino GND
- TX → Arduino Digital Pin 4
- RX → Arduino Digital Pin 3
Installing Libraries:
Through Arduino IDE:
- Open Arduino IDE.
- Go to Tools > Manage Libraries.
- Search for TinyGPS++ and SoftwareSerial libraries and install them.
From GitHub:
You can also download the library files directly from
Code for the Neo-6M GPS Module:
The following code reads data from the Neo-6M GPS module and displays the location on the Serial Monitor:
#include <TinyGPS++.h>
#include <SoftwareSerial.h>

// Define GPS module pins
SoftwareSerial gpsSerial(4, 3); // RX, TX
TinyGPSPlus gps;

void setup() {
  Serial.begin(9600); // For Serial Monitor
  gpsSerial.begin(9600); // For GPS module
  Serial.println("Initializing GPS...");
}

void loop() {
  while (gpsSerial.available() > 0) {
    if (gps.encode(gpsSerial.read())) {
      if (gps.location.isUpdated()) {
        Serial.print("Latitude: ");
        Serial.println(gps.location.lat(), 6);
        Serial.print("Longitude: ");
        Serial.println(gps.location.lng(), 6);
      }
    }
  }
}
Why Use the SIM800L GSM/GPRS Module?
The Neo-6M GPS module only collects location data but does not transmit it to the internet. Using the SIM800L module allows:
- Sending GPS data to a server.
- Displaying the location on Google Maps or other platforms.
- Enabling real-time tracking systems.
Connecting Neo-6M and SIM800L Modules:
Neo-6M → Arduino:
- VCC → 5V
- GND → GND
- TX → Digital Pin 4
- RX → Digital Pin 3
SIM800L → Arduino:
- VCC → 3.7V Power Supply
- GND → GND
- TX → Digital Pin 10
- RX → Digital Pin 11
Displaying GPS Data on a Map:
Required Server and Apps:
- Server: Use platforms like Google Firebase or a Node.js server.
- App: Google Maps API or Thingspeak IoT platform.
- Mobile App: The Blynk App is effective for map visualization.
Code for Neo-6M and SIM800L Modules:
#include <TinyGPS++.h>
#include <SoftwareSerial.h>

TinyGPSPlus gps;
SoftwareSerial gpsSerial(4, 3);  // GPS Pins
SoftwareSerial sim800l(10, 11); // SIM800L Pins

void setup() {
  Serial.begin(9600);
  gpsSerial.begin(9600);
  sim800l.begin(9600);
  Serial.println("Initializing...");
}

void loop() {
  while (gpsSerial.available() > 0) {
    if (gps.encode(gpsSerial.read())) {
      if (gps.location.isUpdated()) {
        float latitude = gps.location.lat();
        float longitude = gps.location.lng();

        Serial.print("Latitude: ");
        Serial.println(latitude, 6);
        Serial.print("Longitude: ");
        Serial.println(longitude, 6);

        // Send HTTP request via SIM800L
        sendToServer(latitude, longitude);
      }
    }
  }
}

void sendToServer(float lat, float lng) {
  sim800l.println("AT+HTTPINIT");
  delay(1000);
  sim800l.println("AT+HTTPPARA=\"URL\",\"http://yourserver.com/update?lat=" + String(lat, 6) + "&lng=" + String(lng, 6) + "\"");
  delay(1000);
  sim800l.println("AT+HTTPACTION=0");
  delay(6000);
  sim800l.println("AT+HTTPTERM");
  delay(1000);
}
How to Display the Data on a Map:
- Thingspeak Platform: Use this IoT platform for easy data visualization.
- Google Maps API: Display the location on a map using the data sent to the server.
- Blynk App: Send data via Neo-6M GPS and SIM800L to visualize real-time tracking on a mobile app.
How Does the Neo-6M GPS Module Work?
The Neo-6M GPS module operates by receiving signals from multiple satellites that are part of the Global Positioning System (GPS) network. These satellites continuously broadcast their positions and time data. The module captures these signals and calculates its distance from the satellites by analyzing the time it took for the signals to reach it. Using data from at least four satellites, the Neo-6M can determine its precise geographic coordinates (latitude and longitude), along with other information such as altitude, speed, and time.
Once the module processes the satellite data, it outputs this information using the NMEA (National Marine Electronics Association) protocol. NMEA is a standard format that organizes the GPS data into readable sentences, which include details about location, satellite status, time, and more. This data is then transmitted via the module’s TX pin to a microcontroller, such as an Arduino.
The Arduino, equipped with appropriate libraries like TinyGPS++, decodes and processes the NMEA data to extract meaningful information. This allows you to obtain real-time insights about your location and other metrics.
While the Neo-6M GPS module can function entirely offline to provide location data, displaying this location visually on a map requires an additional device or server. For example:
- To show the location on a map, the extracted GPS coordinates (latitude and longitude) need to be sent to a mapping service such as Google Maps or an IoT platform like Thingspeak.
- Modules like the SIM800L GSM/GPRS module can be used to transmit the GPS data to an online server via a mobile network, where the coordinates can be plotted on a digital map.
This ability to integrate offline functionality with online visualization makes the Neo-6M an essential tool for projects ranging from vehicle tracking to drone navigation and other location-based applications.
Advantages:
- Real-time location tracking.
- Determination of speed, altitude, and time.
- Useful for IoT-based applications.


1 thought on “Neo-6M GPS Module Guide: Setup & Real-Time Tracking”