esp8288
ESP8266 and ESP32: A Complete Guide (Detailed Information, Testing Codes, and Features)
ESP8266 and ESP32 are two of the most popular microcontroller modules widely used in IoT (Internet of Things) projects. This post provides an in-depth discussion of their features, testing codes, and suitable applications.
Comparison Between ESP8266 and ESP32
| Feature | ESP8266 | ESP32 |
|---|---|---|
| Processor | Single-Core 80/160 MHz | Dual-Core 240 MHz |
| Wi-Fi | 2.4 GHz only | 2.4 GHz only |
| Bluetooth | Not available | Bluetooth 4.2 and BLE (Low Energy) |
| GPIO Pins | 11 usable | 30+ usable |
| ADC Resolution | 10-bit | 12-bit |
| Programming Languages | Arduino IDE, MicroPython | Arduino IDE, MicroPython, ESP-IDF |
| Power Consumption | Higher in active mode | Supports deep sleep (low power) |
| Price | $2-$5 | $5-$10 |
| Suitable Projects | Basic IoT projects, simple automation | Advanced IoT, real-time applications |
ESP8266: Detailed Information
1. Development Boards
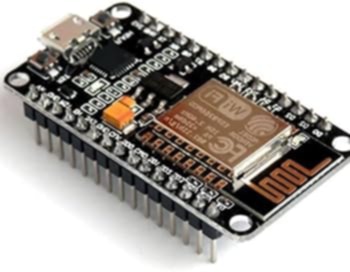
- NodeMCU: The most popular ESP8266-based development board. It comes with a built-in USB-to-Serial converter, making it easy to use.
- WeMos D1 Mini: A small-sized ESP8266 board, perfect for compact and small-scale projects.
2. Wi-Fi Capabilities
- The ESP8266 is a SoC (System on Chip) equipped with a built-in Wi-Fi stack.
- It supports protocols like HTTP, MQTT, and WebSocket.
3. Limitations
- Due to its single-core processor, multitasking capabilities are limited.
- The number of GPIO pins is minimal, which may restrict connecting multiple sensors or devices.
4. Suitable Projects
- Smart home automation (e.g., Light or Fan Control).
- Basic IoT devices.
- Web servers or data loggers.
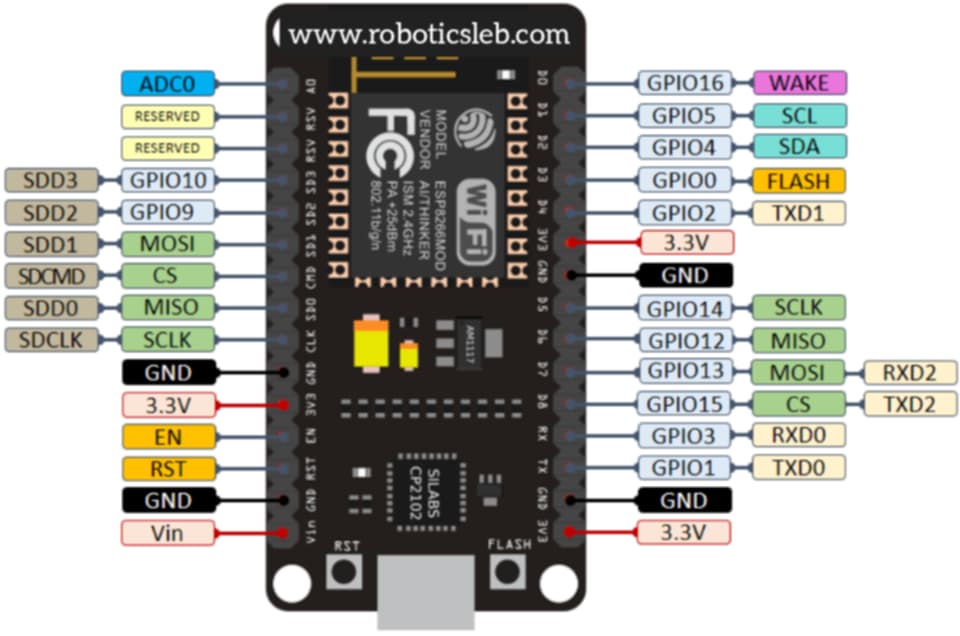
esp 8266 pinoutput
ESP32: Detailed Information
1. Development Boards
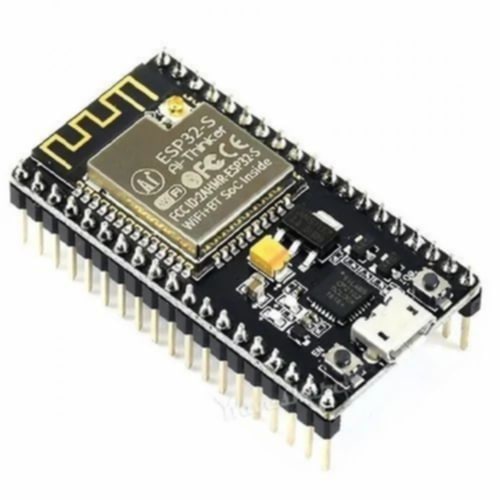
- ESP32 DevKitC: The standard ESP32 development board.
- TTGO T-Display: Comes with a built-in OLED display for enhanced functionality.
- ESP32-CAM: Perfect for projects requiring camera integration.
2. Wi-Fi and Bluetooth Capabilities
- The ESP32 can run Wi-Fi and Bluetooth simultaneously (coexistence).
- BLE (Bluetooth Low Energy) allows connecting low-power devices.
3. Programming Support
- Compatible with Arduino IDE, ESP-IDF, PlatformIO, and MicroPython.
- ESP-IDF provides more customization options for advanced users.
4. Special Features
- Deep Sleep Mode: Ideal for power-saving projects.
- Capacitive Touch: Enables touch interfaces without physical buttons.
- Dual-Core Processor: One core handles the program, and the other handles Wi-Fi tasks.
5. Suitable Projects
- Real-time data processing.
- Smart home projects requiring both Wi-Fi and Bluetooth.
- Image processing (ESP32-CAM).
- Data monitoring and cloud-connected projects.
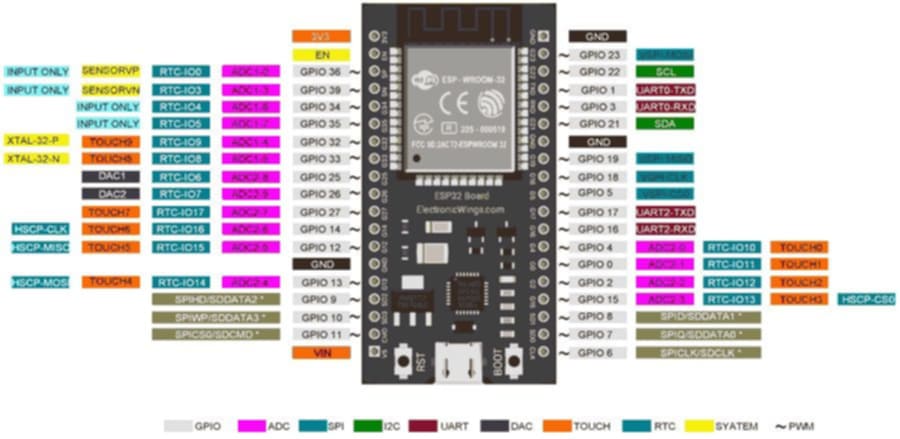
esp32pinoutput
ESP8266 and ESP32 Testing Codes
1. LED Blink Example (ESP8266)
#define LED_PIN 2  // Built-in LED pin on NodeMCU

void setup() {
  pinMode(LED_PIN, OUTPUT);  // Set LED pin as output
}

void loop() {
  digitalWrite(LED_PIN, HIGH); // Turn LED ON
  delay(1000);                // Wait for 1 second
  digitalWrite(LED_PIN, LOW);  // Turn LED OFF
  delay(1000);                // Wait for 1 second
}
Explanation:
- pinMode: Configures the pin as an output to control the LED.
- digitalWrite: Sends a HIGH signal to turn the LED on and a LOW signal to turn it off.
- delay: Adds a pause between turning the LED on and off.
2. LED Blink Example (ESP32)
#define LED_PIN 2  // Built-in LED pin on ESP32

void setup() {
  pinMode(LED_PIN, OUTPUT);  // Set LED pin as output
}

void loop() {
  digitalWrite(LED_PIN, HIGH); // Turn LED ON
  delay(500);                 // Wait for 0.5 seconds
  digitalWrite(LED_PIN, LOW);  // Turn LED OFF
  delay(500);                 // Wait for 0.5 seconds
}
Explanation:
- Similar to the ESP8266 code but with a shorter delay, making the LED blink faster.
3. Wi-Fi Test Example
#include <WiFi.h> // For ESP32
// #include <ESP8266WiFi.h> // Uncomment for ESP8266

const char* ssid = "Your_SSID";       // Your Wi-Fi network name
const char* password = "Your_Password"; // Your Wi-Fi password

void setup() {
  Serial.begin(115200);    // Start Serial Monitor
  delay(1000);

  Serial.println("Connecting to Wi-Fi...");
  WiFi.begin(ssid, password); // Connect to Wi-Fi network

  while (WiFi.status() != WL_CONNECTED) { // Check connection status
    delay(500);
    Serial.print(".");
  }

  Serial.println("\nWi-Fi Connected!");
  Serial.print("IP Address: ");
  Serial.println(WiFi.localIP());  // Print IP address
}

void loop() {
  // No action needed, just keep checking the connection
}
Explanation:
- WiFi.begin: Starts the Wi-Fi connection with the provided SSID and password.
- WiFi.status: Checks whether the connection is established.
- WiFi.localIP: Prints the assigned IP address after a successful connection.
4. ADC (Analog-to-Digital Converter) Test
ESP32 Example:
#define ADC_PIN 34  // One of the ADC pins on ESP32

void setup() {
  Serial.begin(115200);  // Start Serial Monitor
}

void loop() {
  int analogValue = analogRead(ADC_PIN);  // Read from ADC pin
  Serial.print("Analog Value: ");
  Serial.println(analogValue);           // Print value
  delay(500);                            // Wait for 0.5 seconds
}
ESP8266 Example:
void setup() {
  Serial.begin(115200);  // Start Serial Monitor
}

void loop() {
  int analogValue = analogRead(A0);  // Read from ESP8266 ADC pin A0
  Serial.print("Analog Value: ");
  Serial.println(analogValue);       // Print value
  delay(500);                        // Wait for 0.5 seconds
}
Explanation:
- analogRead: Reads the analog value from the specified ADC pin.
- ESP32 provides a higher resolution (12-bit, range: 0-4095) than ESP8266 (10-bit, range: 0-1023).
Where to Buy?
ESP32 and ESP8266 are easily available and affordable on various e-commerce platforms:
- ESP8266: $2-5 (NodeMCU or WeMos D1 Mini).
- ESP32: $5-10 (ESP32 DevKitC or TTGO Board).
Conclusion:
ESP8266 and ESP32 are ideal devices for IoT projects. Choose the one that fits your needs. If you need further assistance, feel free to comment below.
Tags: ESP8266, ESP32, IoT, Arduino, Wi-Fi, Microcontroller
Share this guide to make your projects easier!


Wonderful blog! I foumd it while surfing around on Yahoo News.
Do you have any tips on how to gett listed in Yahoo News?
I’ve been trying for a while but I never seem to get there!
Cheers http://boyarka-Inform.com/
Wonderful blog! I found it while surfing around on Yahoo News.
Do you have any tips on how to get listed in Yahoo News?
I’ve been trying for a while but I never seem to gget there!
Cheers http://boyarka-Inform.com/